
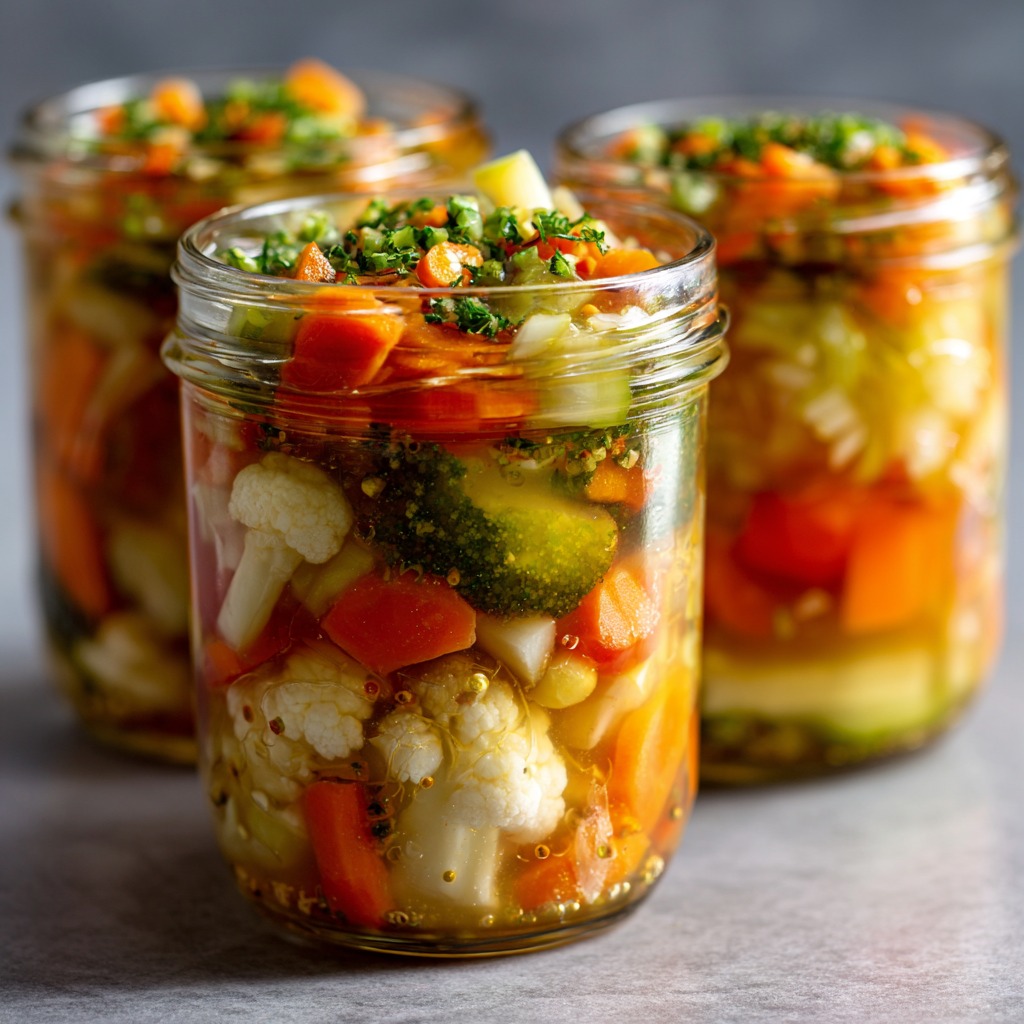
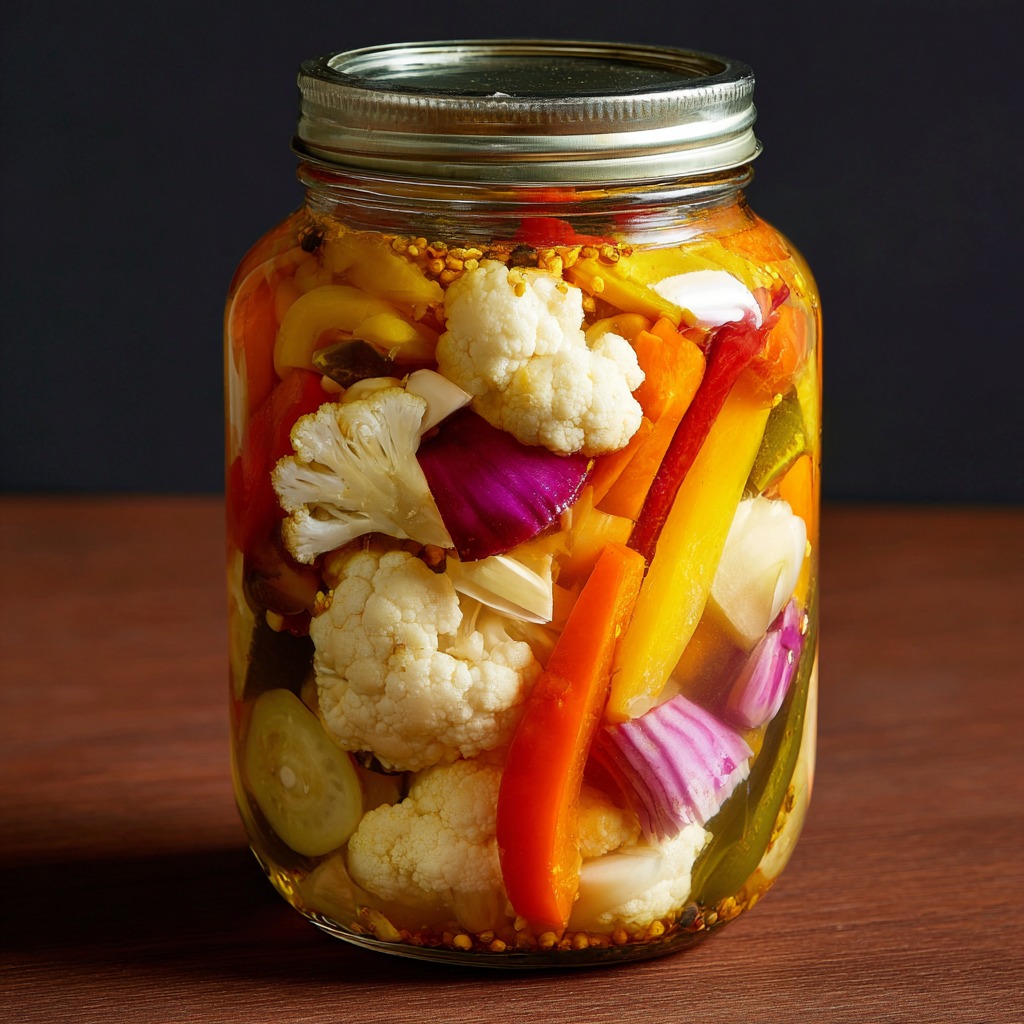
If you enjoy strong, spicy, and crunchy condiments, a fermented giardiniera recipe is the perfect way to elevate your meals. This naturally fermented Italian relish derives its sourness from lactic acid fermentation, resulting in a deeper, more complex flavor than the vinegar-pickled version. This food is beneficial for you and rich in probiotics. It contains a variety of vegetables, including cauliflower, carrots, celery, and peppers.
Making a homemade fermented giardiniera recipe is easier than you might think and very satisfying. The process involves placing fresh, chopped vegetables in a saltwater brine, which allows good bacteria to grow while keeping bad bacteria at bay. The vegetables change over the course of a few days. They become crunchy, a little sour, and full of fragrant herbs and spices that make this classic Italian condiment so hard to resist.
This fermented giardiniera recipe goes great with sandwiches, charcuterie boards, pasta salads, and roasted meats. In addition to tasting great, it also supports digestion and gut health because it contains live cultures produced during fermentation. Whether you’re a fermentation expert or just starting, learning how to make giardiniera will give you access to a world of delicious, homemade probiotics and bright, Mediterranean flavors.
- 🥕 What Is Fermented Giardiniera?
- 🌍 Origins and History
- 🧂 Ingredients for the Perfect Fermented Giardiniera Recipe
- 🍶 Step-by-Step Fermented Giardiniera Recipe Guide
- 🧠 Fermentation Tips and Troubleshooting for the Perfect Fermented Giardiniera Recipe
- 🔍 Signs Your Fermentation Is Going Well
- 🌶 Flavor Variations and Creative Twists on the Fermented Giardiniera Recipe
- 🌶 Spicy Chicago-Style Fermented Giardiniera Recipe
- 🫑 Mediterranean-Inspired Fermented Giardiniera Recipe
- 🍽 How to Use Fermented Giardiniera Recipe in Everyday Meals
- 🩺 Health Benefits of Fermented Giardiniera Recipe
- 🌿 1. Probiotic Powerhouse
- 🧊 Storing and Shelf Life of Fermented Giardiniera Recipe
- Conclusion
- Share Your Twist!
🥕 What Is Fermented Giardiniera?
The Fermented Giardiniera Recipe is an ancient method for preserving vegetables by allowing them to ferment naturally. It originated in Italy as a means to preserve the summer harvest for the winter. It achieves this by immersing colorful vegetables, such as cauliflower, carrots, peppers, and celery, in a saltwater brine.
The word “giardiniera” means “from the garden.” This recipe is all about the fresh vegetables from the garden, which are transformed into a tangy, crunchy condiment full of life and flavor.
This fermented giardiniera doesn’t use acid to quickly preserve vegetables, unlike vinegar pickles. Instead, it relies on good bacteria to turn natural sugars into lactic acid. This process not only gives your giardiniera that sour taste that makes you want more, but it also adds probiotics that are good for your gut and your immune system.
“Fermentation is the oldest form of food preservation — and one of the healthiest,” says Sandor Katz, author of Wild Fermentation.
🧄 Fermented vs. Pickled Giardiniera
| Feature | Fermented Giardiniera | Pickled Giardiniera |
|---|---|---|
| Preservation method | Natural lactic acid fermentation | Vinegar or acidic brine |
| Flavor profile | Deep, complex, tangy, slightly funky | Sharp, vinegary, instant sourness |
| Health benefits | Contains live probiotics and enzymes | No probiotics (vinegar kills bacteria) |
| Time required | 5–10 days for fermentation | 1–2 hours for pickling |
| Shelf life | Months (refrigerated) | Weeks to months (depending on acidity) |
🌍 Origins and History
The Fermented Giardiniera Recipe is hundreds of years old and comes from the simple kitchens of Northern Italy. To ensure they had crunchy vegetables all winter long, families would gather seasonal vegetables, chop them into very small pieces, and place them in ceramic crocks to ferment.
Italian immigrants introduced giardiniera to Chicago, modifying it by incorporating hot peppers and olive oil. This is the famous Chicago-style giardiniera, often used on Italian beef sandwiches.
💡 Why Try a Fermented Giardiniera Recipe?
Here’s why you’ll fall in love with this recipe:
Zero Waste: A perfect way to use up extra garden vegetables.
Probiotic Power: Supports digestion and boosts immunity naturally.
Flavor Explosion: A rich, tangy complexity you can’t get from vinegar pickles.
Long Shelf Life: Keeps for months when stored properly.
Versatile: Pairs perfectly with sandwiches, salads, meats, and more.
🧂 Ingredients for the Perfect Fermented Giardiniera Recipe
The magic of a great Fermented Giardiniera Recipe lies in its fresh vegetables, proper brine ratio, and patience.
Below is a detailed guide to the ingredients and tools you’ll need.
🥦 Essential Vegetables
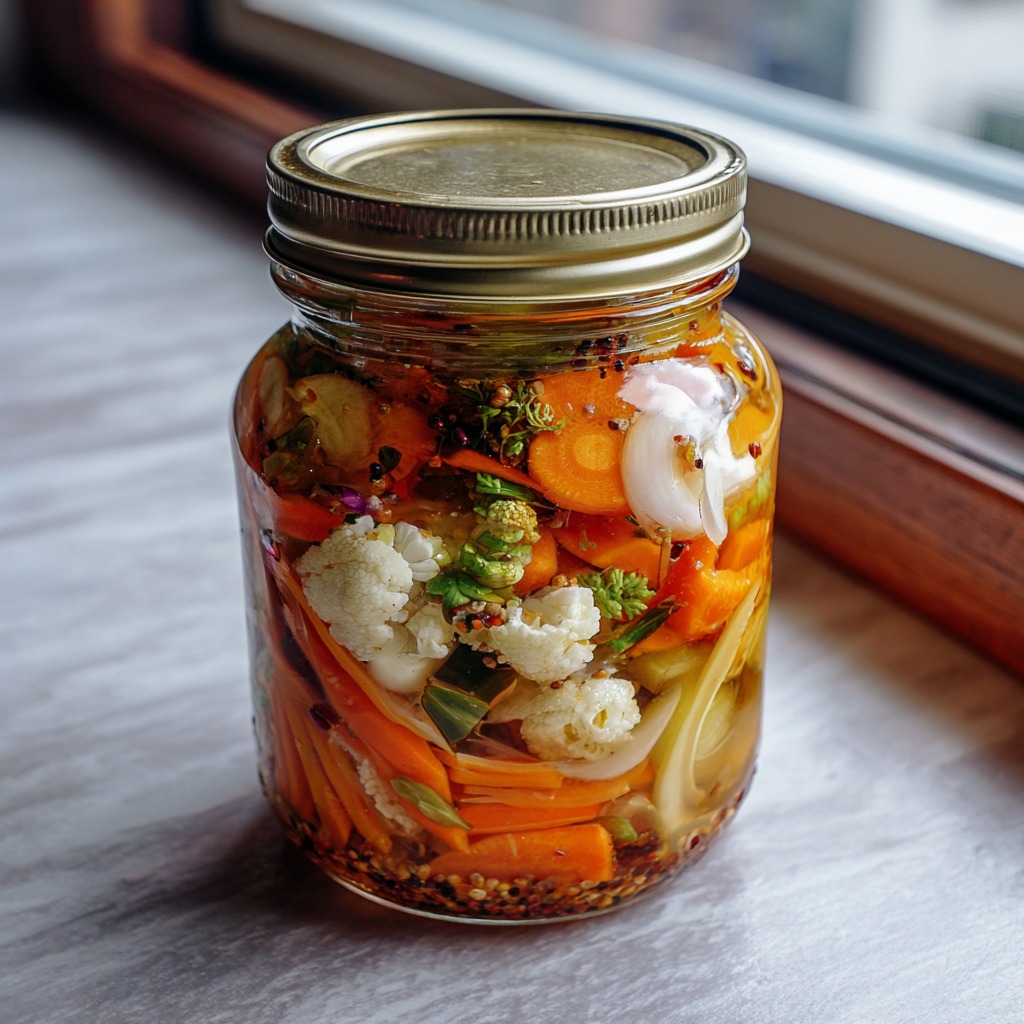
You can use almost any combination of crunchy vegetables. Traditional Italian giardiniera usually includes:
- 2 cups cauliflower florets
- 1 cup carrot slices
- 1 cup celery chunks
- 4 cloves garlic, smashed
- 1 cup bell peppers (mixed colors for vibrancy)
- 2–3 jalapeños or sport peppers (for heat)
- ½ cup green olives, halved (optional)
Pro Tip: Choose vegetables that are firm and fresh. Soft or overripe vegetables may become mushy during fermentation.
💧 Brine Basics
Your brine is the foundation of successful fermentation. The right salt-to-water ratio protects your vegetables and encourages the right bacteria to grow.
| Ingredient | Amount | Notes |
|---|---|---|
| Water | 4 cups (non-chlorinated) | Filtered or spring water works best |
| Salt | 2½ tablespoons | Use sea salt or pickling salt (no iodine) |
- Stir until fully dissolved.
- The ideal brine concentration is 3–3.5%, which is perfect for crunchy vegetables.
- Always keep the veggies fully submerged to prevent mold.
🌿 Flavor Boosters and Add-Ins
Add aromatic herbs and spices for a unique signature flavor:
- 1 teaspoon dried oregano
- 1 teaspoon mustard seeds
- ½ teaspoon black peppercorns
- ½ teaspoon red chili flakes
- 2 bay leaves
- Optional: A few sprigs of fresh thyme or rosemary
These ingredients enhance the depth of your Fermented Giardiniera Recipe without overpowering the natural sourness.
🫙 Equipment Checklist
To make your fermentation easy and safe, gather these essentials:
Mixing bowl and measuring spoons
Glass jars (1-liter or quart size)
Fermentation weight (to keep veggies submerged)
Airlock lid or breathable cloth cover
Non-metal utensils (fermentation reacts with metal)
🍶 Step-by-Step Fermented Giardiniera Recipe Guide
Ready to make your own batch? Here’s the step-by-step Fermented Giardiniera Recipe with clear instructions for perfect results every time.
🔪 Step 1 – Prepping Vegetables
- Wash all vegetables thoroughly in cool water.
- Chop them into bite-sized, uniform pieces for even fermentation.
- Peel carrots, trim cauliflower into florets, slice celery, and dice bell peppers.
- Smash garlic lightly to release flavor.
Tip: Uniform size ensures the vegetables ferment at the same rate and stay crisp.
💦 Step 2 – Making the Brine
- Combine 4 cups of filtered water with 2½ tablespoons of salt.
- Stir until the salt dissolves completely.
- Taste: it should be pleasantly salty, similar to sea water.
- Pour the brine over the vegetables until they are fully submerged.

🫙 Step 3 – Packing the Jars
- Place your chopped vegetables in the jar layer by layer, mixing colors evenly.
- Add spices and herbs as you go for even flavor distribution.
- Pour the brine over the veggies, leaving about 1 inch of headspace at the top.
- Place a fermentation weight or small clean jar lid on top to keep vegetables submerged.
- Cover with an airlock lid or a clean cloth secured with a rubber band.
Important: Oxygen exposure encourages mold. Always keep everything below the brine.
⏳ Step 4 – Fermenting Process
- Store the jar at room temperature (65–75°F / 18–24°C).
- Let it ferment for 5 to 10 days, depending on your taste preference.
- Check daily:
- Tiny bubbles? That’s fermentation magic!
- Cloudy brine? Perfectly normal.
- Veggies floating? Press them down gently.
- Taste around day 5. When tangy enough, move to the fridge to slow fermentation.
| Fermentation Time | Taste Level | Texture |
|---|---|---|
| 3–4 days | Mild tang | Extra crisp |
| 5–7 days | Balanced flavor | Crunchy |
| 8–10 days | Deeply sour | Slightly softer |
“Fermentation is an art ; not a fixed recipe. Taste along the way and trust your senses.”
❄️ Step 5 – Storing and Finishing
It will keep well for 3–6 months refrigerated ; and may even improve over time.
Once your Fermented Giardiniera Recipe tastes perfect, remove the weight and close with a tight-fitting lid.
Store in the refrigerator. The cold temperature halts further fermentation.
Optional: Mix with olive oil before serving for that Chicago-style giardiniera twist.
🧠 Fermentation Tips and Troubleshooting for the Perfect Fermented Giardiniera Recipe
Fermenting vegetables is a mix of art and science. Even if you use the best ingredients and follow the correct steps, small variations in temperature, salt concentration, or equipment can alter the results.
Here are some important tips and ways to address common issues that will help your Fermented Giardiniera Recipe turn out perfectly every time.
🔍 Signs Your Fermentation Is Going Well
When your jar is healthy, you’ll notice the following:
- Tiny bubbles rising to the top (a sign of active fermentation)
- Cloudy brine – this means beneficial bacteria are doing their job
- Slight tangy aroma – fresh, sour, but not foul
- Firm vegetables – not soft or slimy
“If it smells fresh and pleasantly sour, it’s probably safe. If it smells rotten or looks fuzzy, toss it.”
; Fermentation safety principle from the National Center for Home Food Preservation
⚠️ Common Fermentation Problems (and Easy Fixes)
| Problem | Possible Cause | Solution |
|---|---|---|
| Mold on top | Vegetables not fully submerged | Remove top layer, replace brine, keep submerged |
| Slimy texture | Too warm or too little salt | Move to cooler area; increase salt slightly next time |
| Soft or mushy vegetables | Overripe produce or over-fermentation | Use fresher veggies; reduce fermentation time |
| Foul smell | Contamination or metal contact | Discard batch; sanitize tools and avoid metal |
| Brine overflow | Overfilled jar | Leave 1 inch headspace; use a tray under jars |
🧂 Adjusting Salt Levels and Temperature
Salt is the backbone of your Fermented Giardiniera Recipe.
- Too little salt: Vegetables ferment too quickly, risking spoilage.
- Too much salt: Fermentation slows or stops entirely.
The sweet spot is 3% brine, meaning 30 grams of salt per liter of water.
Always use non-iodized salt (iodine can inhibit fermentation bacteria).
Temperature also matters:
| Temperature | Fermentation Speed | Recommended Duration |
|---|---|---|
| 60°F (16°C) | Slow | 10–12 days |
| 70°F (21°C) | Ideal | 6–8 days |
| 80°F (27°C) | Fast | 3–5 days (monitor closely) |

🧴 Safe Fermentation Practices
To ensure success every time:
- Wash all produce and tools thoroughly.
- Avoid tap water with chlorine (it kills beneficial bacteria).
- Keep jars out of direct sunlight.
- Always use clean, dry hands or tongs when handling vegetables.
- Label jars with the date you started fermenting.
By following these simple yet powerful guidelines, you’ll produce a safe, delicious, and probiotic-rich Fermented Giardiniera Recipe every single time.
🌶 Flavor Variations and Creative Twists on the Fermented Giardiniera Recipe
Once you’ve mastered the basic Fermented Giardiniera Recipe, it’s time to experiment!
Fermentation is incredibly flexible, allowing endless combinations of vegetables, herbs, and spices. Here are several ways to personalize your batch.
🇮🇹 Classic Italian Fermented Giardiniera
This traditional version emphasizes aromatic herbs and a mild tangy flavor.
Ingredients to highlight:
- Oregano
- Garlic
- Black peppercorns
- Olive oil drizzle after fermentation
Serve with: antipasto platters, focaccia, or Italian cured meats.
🌶 Spicy Chicago-Style Fermented Giardiniera Recipe
This famous Chicago-Style Fermented Giardiniera Recipe adds heat and oil for extra richness.
Ingredients:
- Sport peppers or serranos for fire
- Crushed red chili flakes
- After fermentation: drain brine and mix with olive oil (½ cup per quart)
Serving ideas:
- On Italian beef sandwiches
- With hot dogs, pizza, or nachos
“Chicago-style giardiniera isn’t just a topping ;it’s a lifestyle condiment,” say local chefs from Portillo’s.
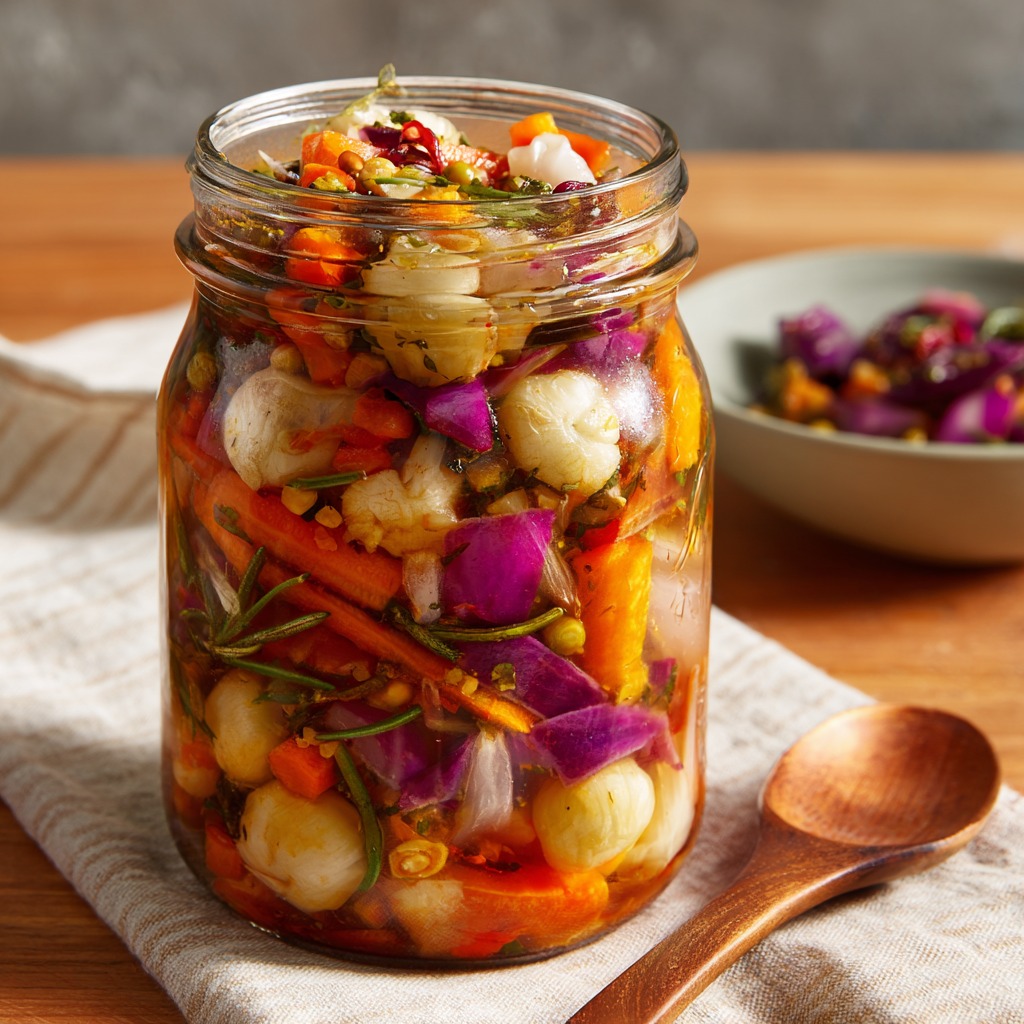
🫑 Mediterranean-Inspired Fermented Giardiniera Recipe
Give your ferment a coastal twist with sun-drenched flavors.
Add:
- Artichoke hearts
- Kalamata olives
- Capers
- Fresh rosemary and thyme
Pairs beautifully with: roasted fish, hummus plates, or grilled vegetables.
🥕 Quick “Half-Fermented” Giardiniera
Short on time? Try this variation:
- Ferment vegetables for just 3 days for a milder, slightly tangy flavor.
- Finish by refrigerating and adding olive oil and vinegar for balance.
This hybrid version offers a gentler introduction for those new to fermentation.
🍽 How to Use Fermented Giardiniera Recipe in Everyday Meals
Your Fermented Giardiniera Recipe is more than a condiment — it’s a versatile ingredient that transforms ordinary meals into gourmet experiences.
Here’s how to make the most of it!
🥪 Classic Uses
- Sandwiches: Add a spoonful to Italian beef, subs, or grilled cheese for a tangy crunch.
- Pizza Topping: Scatter over Margherita or veggie pizza for brightness.
- Charcuterie Boards: Serve with cheeses, olives, and cured meats.
- Salads: Chop finely and toss with olive oil for a quick salad dressing.
🍝 Creative Cooking Ideas
- Pasta Toss: Mix into pasta with olive oil and Parmesan for instant flavor.
- Omelets or Scrambles: Adds tang and texture to breakfast dishes.
- Tacos & Wraps: Great on fish tacos or veggie wraps.
- Grain Bowls: Add to quinoa or farro bowls for acidity and crunch.
🍷 Perfect Pairings
| Dish Type | Ideal Pairing | Why It Works |
|---|---|---|
| Italian Beef Sandwich | Spicy giardiniera | Balances richness with acidity |
| Roasted Chicken | Mild giardiniera | Adds brightness |
| Charcuterie Board | Classic version | Enhances salty cured meats |
| Pasta Salad | Mixed giardiniera | Boosts texture and tang |
| Red Wine (Chianti) | Fermented giardiniera | Complements earthy, savory notes |
“A spoonful of giardiniera can transform any meal ; it’s the secret weapon of flavor lovers.”
🩺 Health Benefits of Fermented Giardiniera Recipe
A Fermented Giardiniera Recipe is not only good for your health and nutrition but also tastes great. This isn’t just a condiment; it’s a functional food that helps your body in many ways.
🌿 1. Probiotic Powerhouse
During fermentation, lactic acid bacteria convert natural sugars in vegetables into organic acids. This creates a tangy taste and produces live probiotics, similar to those found in yogurt or kombucha.
Benefits of probiotics include:
- Improved digestion and nutrient absorption
- Enhanced immune system response
- Reduced inflammation and bloating
- Support for mental health through the gut-brain connection
“Fermented foods are living nutrition ; they don’t just preserve food, they transform it into something even more beneficial.”
; Dr. Robert Hutkins, Food Microbiologist

🥕 2. Packed with Vitamins and Antioxidants
Your Fermented Giardiniera Recipe retains the natural vitamins and minerals from its fresh vegetables — including Vitamin C, Vitamin K, potassium, and fiber.
Fermentation can even increase the bioavailability of certain nutrients, making them easier for your body to absorb.
| Nutrient | Benefits | Found In |
|---|---|---|
| Vitamin C | Boosts immunity | Peppers, cauliflower |
| Fiber | Improves digestion | Carrots, celery |
| Vitamin K | Supports bone health | Cauliflower |
| Antioxidants | Reduces inflammation | Bell peppers, garlic |
💪 3. Supports Gut Health and Balance
Fermented foods are vital for maintaining a healthy gut microbiome, which impacts everything from digestion to mood and metabolism. Regularly consuming small amounts of fermented giardiniera can:
- Balance intestinal flora
- Reduce sugar cravings
- Improve regularity and metabolism
❤️ 4. Natural Detoxification and Weight Support
Because it’s low in calories and high in flavor, your Fermented Giardiniera Recipe can replace processed sauces and dressings. The probiotics and fiber help your body naturally eliminate waste while supporting better nutrient absorption.
🧊 Storing and Shelf Life of Fermented Giardiniera Recipe
Proper storage ensures your hard work pays off and your giardiniera stays safe and flavorful.
🫙 How to Store After Fermentation
- Once you’re happy with the flavor, remove any weights and seal the jar tightly.
- Store in the refrigerator (ideally 35–40°F or 1–4°C).
- Keep vegetables submerged in brine — it acts as a natural preservative.
Tip: If you added olive oil (for a Chicago-style version), shake the jar before each use to remix the brine and oil.
⏳ Shelf Life Guide
| Storage Method | Shelf Life | Notes |
|---|---|---|
| Refrigerator (sealed) | 3–6 months | Maintain brine coverage |
| Room temperature | 1–2 weeks | Only short-term; flavor may intensify |
| Freezer | Not recommended | Kills probiotics and affects texture |
⚠️ When to Discard Your Fermented Giardiniera
Discard if you notice:
- Visible mold or fuzzy growth
- Strong rotten or chemical odor
- Slimy or extremely soft vegetables
When stored correctly, your Fermented Giardiniera Recipe will keep beautifully for months, offering you a ready burst of flavor anytime.

Fermented Giardiniera Recipe
Equipment
- 1-quart or 1-liter glass jar
- Fermentation weight or small jar to keep vegetables submerged
- Airlock lid or breathable cloth with rubber band
- Mixing bowl
- Measuring spoons
- Non-metal utensils (spoon, tongs)
Ingredients
- 2 cups cauliflower florets
- 1 cup carrots sliced
- 1 cup celery chopped
- 1 cup mixed bell peppers chopped
- 2 –3 jalapeños or sport peppers
- 4 garlic cloves smashed
- ½ cup green olives halved (optional)
- 4 cups filtered water
- 2½ tablespoons sea salt non-iodized
- 1 teaspoon dried oregano
- 1 teaspoon mustard seeds
- ½ teaspoon black peppercorns
- ½ teaspoon red chili flakes
- 2 bay leaves
- Optional: ½ cup olive oil for finishing
Instructions
- Wash and chop all vegetables evenly.
- Dissolve salt in filtered water to make a 3% brine.
- Pack vegetables tightly into the glass jar.
- Add herbs and spices between layers.
- Pour the brine over the vegetables until fully submerged.
- Place a fermentation weight on top to keep vegetables submerged.
- Cover jar with an airlock lid or cloth secured with a rubber band.
- Ferment at room temperature (65–75°F / 18–24°C) for 5–10 days. Taste daily after day 4.
- Once tangy to your liking, remove the weight and seal the jar with a tight lid. Refrigerate.
- Optional: Mix with olive oil before serving for Chicago-style giardiniera.
Notes
- Fermentation time: Cooler temperatures may require up to 10 days; warmer climates may ferment faster.
- Taste test: Start tasting on day 5. Stop fermentation when flavor is preferred.
- Cloudy brine: Normal and indicates active fermentation. Do not discard.
- Storage: Keeps in the refrigerator for 3–6 months. Ensure vegetables stay submerged in brine.
- Safety tip: Discard if mold, foul odor, or slimy texture appears.
- Variations: Add artichoke hearts, sun-dried tomatoes, or fresh herbs for a Mediterranean twist.

Conclusion
Making your own Fermented Giardiniera Recipe at home is not only fun, but it also makes everyday meals taste better. This classic Italian condiment adds probiotics and bright flavor to your food. The crunchy, tangy vegetables, along with the strong scent of herbs and spices, are two of its best features. It adds a refreshing zing that store-bought versions can’t match, whether you spoon it on sandwiches, toss it into salads, or serve it with roasted meats.
This recipe is really special because it tastes great and is good for you. Your homemade giardiniera is full of probiotics, fiber, and vitamins. It helps digestion, boosts immunity, and adds a healthy, natural element to your diet. You can make a versatile, long-lasting, and healthy condiment that will be a staple in your kitchen for months to come with just a few simple ingredients, some time, and careful fermentation.
Share Your Twist!
We’d love to see how you put your own spin on this Fermented Giardiniera Recipe! Try out different vegetables, spices, or levels of heat to make a version that you like best. Did you add a mix of herbs, artichokes, or sun-dried tomatoes? Please share your twist in the comments below or tag us on social media. Your creativity might inspire other people to start fermenting too!
Frequently Asked Questions (FAQs)
What is Fermented Giardiniera?
Fermented Giardiniera is a tangy, crunchy Italian condiment made by fermenting fresh vegetables like cauliflower, carrots, celery, and peppers in a saltwater brine, creating probiotics and complex flavors.
How long does Fermented Giardiniera take to ferment?
Fermentation typically takes 5–10 days at room temperature (65–75°F / 18–24°C). Taste it starting on day 5 to check if the tanginess is to your liking.
Can I use vinegar instead of fermenting?
You can make vinegar-pickled giardiniera, but it will not have probiotics or the same depth of flavor as naturally fermented giardiniera.
How should I store fermented giardiniera?
Once fermented, store in the refrigerator with the vegetables submerged in brine. It will keep for 3–6 months.
Can I add other vegetables or herbs?
Yes! You can experiment with artichoke hearts, sun-dried tomatoes, fresh herbs, or different peppers to create your own twist on the Fermented Giardiniera Recipe.
