
Fruit Cocktail Canning Recipe is a fantastic way to preserve the flavors of fresh, seasonal fruits and enjoy them throughout the year. By making your own fruit cocktail at home, you not only save money, but you also have complete control over the ingredients, ensuring a healthier, all-natural version without the added sugars or preservatives found in store-bought varieties. Whether you’re a seasoned canner or a beginner, this recipe provides a simple, easy-to-follow guide for creating your own homemade fruit cocktail.
The process of canning fruit cocktail is straightforward and incredibly rewarding. You’ll be able to mix and match your favorite fruits, such as peaches, pears, pineapples, and cherries, and create a customized blend that suits your taste. Plus, once your fruit cocktail is canned, it can last for up to a year when stored properly, giving you a delicious treat to enjoy during the colder months when fresh fruit isn’t as readily available.
In this guide, we’ll walk you through each step of the canning process, from choosing the right fruits to sterilizing jars and sealing your fruit cocktail for storage. So, if you’re ready to get started, grab your favorite fruits, and let’s dive into this easy and satisfying canning adventure!
- What is Fruit Cocktail Canning Recipe?
- Why Should You Can Your Own Fruit Cocktail?
- The Best Fruits to Use for Your Fruit Cocktail Canning Recipe
- Essential Tools and Equipment for Canning Fruit Cocktail
- How to Prepare Your Fruits for Canning
- Fruit Cocktail Canning Recipe: Step-by-Step Guide
- Tips for Perfecting Your Fruit Cocktail Canning Recipe
- Troubleshooting Common Fruit Cocktail Canning Problems
- How to Use Your Homemade Canned Fruit Cocktail
- Frequently Asked Questions About Canning Fruit Cocktail
- Conclusion: Enjoy Your Homemade Fruit Cocktail Year-Round
What is Fruit Cocktail Canning Recipe?
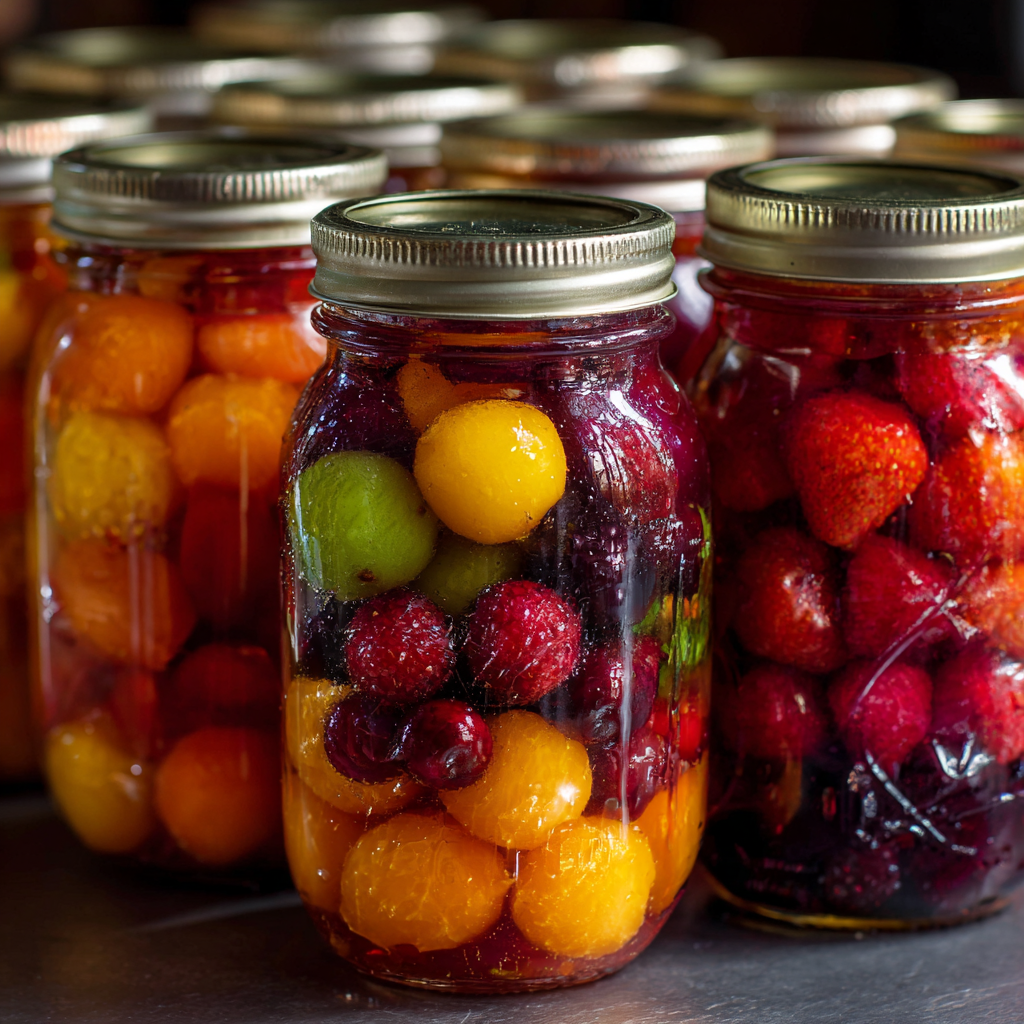
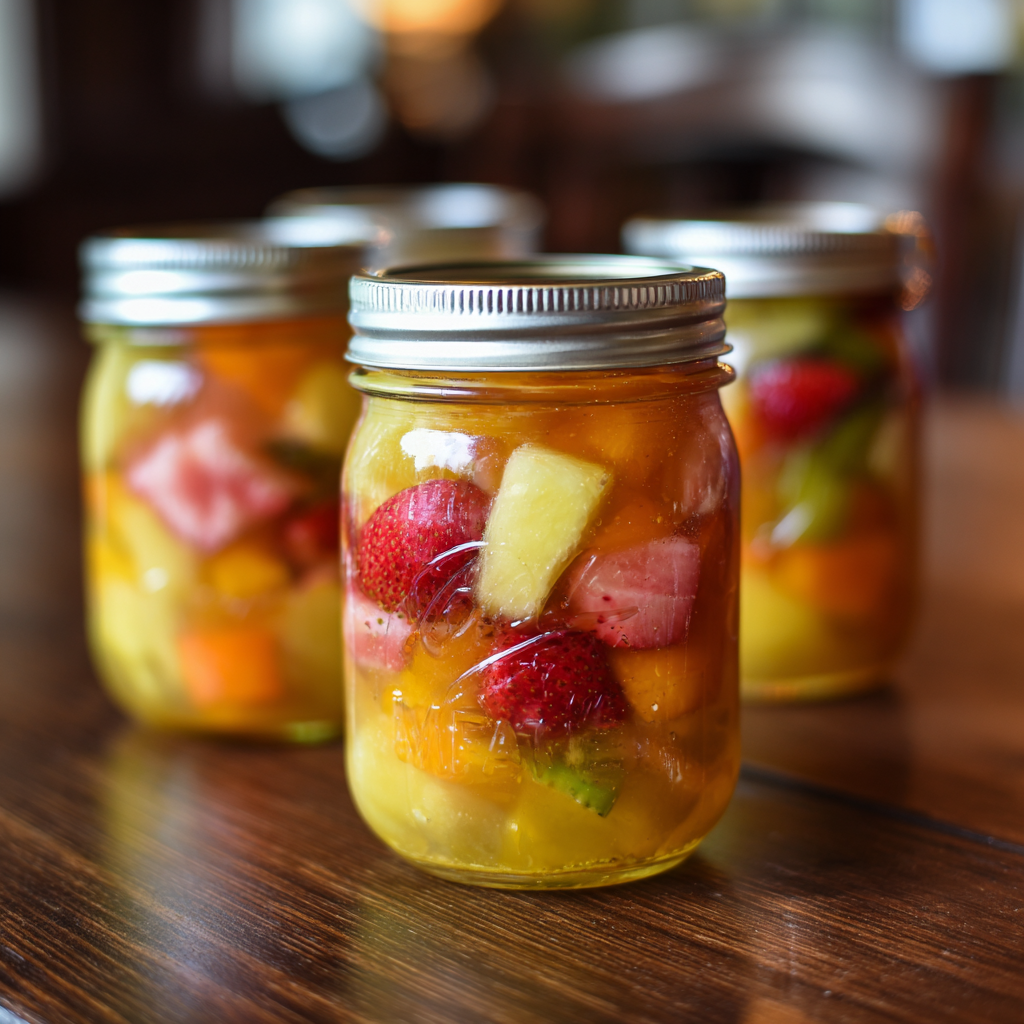
Fruit Cocktail Canning Recipe is the process of preserving a mix of fruits in jars for long-term storage. The fruits are usually packed in syrup or their own juice, sealed in sterilized jars, and processed to ensure safety and longevity. Canning is a wonderful method to save fresh fruits from the harvest season and enjoy them at a later time, often months or even a year later. The fruits used in a fruit cocktail canning recipe vary, but common choices include peaches, pears, grapes, cherries, and pineapple.
Unlike store-bought canned fruit cocktail, which may contain added preservatives or unnatural sweeteners, homemade canned fruit cocktail gives you full control over the ingredients and the level of sweetness. It’s a healthier and more flavorful option for families who want to enjoy fruit all year round.
Why Should You Can Your Own Fruit Cocktail?
There are many reasons to try canning your own fruit cocktail, and here are just a few of the most significant benefits:
- Preservation of Seasonal Fruits: By canning fruit cocktails, you can preserve the best of the season when fruits are at their peak flavor and availability. This allows you to enjoy the deliciousness of summer fruit even in the dead of winter.
- Customization: Homemade fruit cocktail allows you to select your favorite fruits and customize the sweetness level according to your preferences. You can mix and match fruits based on the seasons, giving you endless flavor combinations.
- Cost-Effective: While store-bought canned fruit cocktail can be expensive, canning at home is a much more affordable option in the long run. Plus, you can take advantage of fruit sales and bulk buying to further cut down costs.
- Control Over Ingredients: Store-bought canned fruit often contains added sugars, preservatives, and artificial colors. By canning your own fruit cocktail, you control the ingredients, ensuring a healthier and more natural product.
- Satisfaction of Home Preservation: There’s something immensely rewarding about canning your own fruit cocktail. You’ll enjoy knowing that you’ve put in the time and effort to create something that your family can enjoy for months to come.
The Best Fruits to Use for Your Fruit Cocktail Canning Recipe
When it comes to creating your own fruit cocktail, you have plenty of options. Here’s a breakdown of the most common fruits used in Fruit Cocktail Canning Recipe:
1. Peaches
Peaches are the classic fruit in any fruit cocktail. Their juicy sweetness adds the perfect balance to the mix, and they hold up well during the canning process.
2. Pears
Pears are another great choice, offering a smooth, mellow sweetness. Be sure to use slightly firm pears to avoid them becoming too mushy after canning.
3. Pineapple
Pineapple adds a tropical flair to your fruit cocktail. Its tangy sweetness complements the other fruits nicely, and its texture holds up well in jars.
4. Grapes
Grapes, particularly seedless varieties, are a great addition to your homemade fruit cocktail. They bring a pop of color and a burst of natural sweetness.
5. Cherries
Cherries add a pop of color and a burst of tartness. Whether you go for sweet or sour cherries, they add a wonderful contrast to the sweetness of the other fruits.
6. Mango (Optional)
For a more exotic twist, consider adding mango. This tropical fruit is rich, juicy, and aromatic, giving your fruit cocktail a delightful tropical touch.
7. Apples (Optional)
Apples, especially firm varieties, can add a crunchy texture to the fruit cocktail. However, they tend to brown over time, so it’s a good idea to pre-treat them with ascorbic acid to keep them fresh.
Pro Tip: When creating your fruit cocktail, aim for a balanced combination of sweet, tart, and tropical fruits. This creates a well-rounded flavor profile.
Essential Tools and Equipment for Canning Fruit Cocktail
Before you start your fruit cocktail canning journey, you’ll need the right tools. Here’s a list of everything you’ll need:
1. Canning Jars
You’ll need sterilized canning jars to store your fruit cocktail. Pint or quart-sized jars are common for fruit cocktails, but you can adjust the size depending on your needs. Always use jars specifically designed for canning, as they can withstand the pressure and heat of the process.
2. Lids and Bands
To properly seal your jars, you’ll need flat canning lids and screw bands. These will ensure that your jars are airtight and safe for long-term storage.
3. Canning Pot
A large pot is required for water-bath canning, the most common method used for Fruit Cocktail Canning Recipe. Make sure the pot is deep enough to submerge the jars completely.
4. Jar Lifter and Funnel
A jar lifter helps safely handle hot jars, while a funnel ensures that your syrup and fruit go into the jars without spilling.
5. Cutting Board and Knife
You’ll need a sturdy cutting board and a sharp knife to prepare the fruits for canning. Be sure to slice the fruits evenly to create a nice mix in each jar.
6. Pectin and Sugar
Some fruit cocktail recipes may require pectin (a natural gelling agent) and sugar for the syrup. However, you can opt for a sugar-free version if you prefer.
7. Citric Acid or Ascorbic Acid
These acids are used to prevent fruits, like apples and pears, from browning during the canning process.
How to Prepare Your Fruits for Canning
Preparation is key when it comes to canning fruit cocktail. Properly preparing your fruits will ensure they stay fresh, flavorful, and safe to eat.
1. Washing and Peeling
Start by thoroughly washing all the fruits to remove dirt and pesticides. You may need to peel certain fruits, such as peaches, pears, and pineapples, to get rid of the skin.
2. Cutting Fruits into Uniform Pieces
Cut the fruits into uniform, bite-sized pieces to ensure they pack nicely into the jars. Aim for chunks that are about 1 to 1.5 inches in size.
3. Preventing Browning
To prevent fruits like apples and pears from browning, dip them in a mixture of water and ascorbic acid or citric acid. This helps maintain their bright color throughout the canning process.
4. Optional: Blanching Fruits
Blanching is an optional step where you briefly boil fruits like peaches and pears before canning. This helps preserve their flavor, color, and texture. After blanching, immediately cool the fruits in ice water to stop the cooking process.
5. Preparing Syrup
Depending on your preference, you can make your own syrup or use fruit juice. To make syrup, combine water and sugar in a saucepan and bring to a boil. You can adjust the sweetness based on your taste.
Fruit Cocktail Canning Recipe: Step-by-Step Guide
Now that you’re familiar with the fruits and tools you’ll need, it’s time to start canning! Follow these steps to ensure the perfect fruit cocktail.
Step 1: Sterilizing Your Jars and Lids
Start by sterilizing your jars and lids to prevent contamination. You can do this by placing them in a large pot of boiling water for 10 minutes. Alternatively, you can sterilize the jars in the oven at 225°F for 15 minutes.
Step 2: Preparing the Syrup
Make your syrup by combining water and sugar in a saucepan. Bring the mixture to a boil, stirring occasionally until the sugar dissolves. For a lighter syrup, use less sugar; for a heavier syrup, add more. If you prefer, you can use fruit juice instead of syrup for a more natural option.
Step 3: Packing the Jars
Once your fruits are ready, pack them tightly into the sterilized jars. Start by layering the fruits, ensuring that you distribute them evenly. After packing the fruit, pour the syrup or juice into the jars, leaving about half an inch of space at the top.
Step 4: Sealing and Processing the Jars
Place the sterilized lids on top of the jars, then screw the bands on until they are snug, but not too tight. Place the jars in your canning pot, ensuring they are completely submerged in water. Bring the water to a boil and process the jars for about 30 minutes. After processing, let the jars cool before checking the seals.
Step 5: Storing Your Canned Fruit Cocktail
Once your jars are sealed and cooled, store them in a cool, dark place. Your homemade fruit cocktail will last for up to a year when stored properly.
Tips for Perfecting Your Fruit Cocktail Canning Recipe
- Fruit Texture: Be careful not to overcook the fruit. Overcooked fruit can become mushy, so monitor your processing time closely.
- Adjusting Sweetness: If you prefer a less sweet fruit cocktail, reduce the sugar in the syrup. You can also experiment with sugar substitutes like honey or stevia.
- Flavor Add-ins: Spice up your fruit cocktail by adding vanilla extract, cinnamon sticks, or a splash of lemon juice to the syrup.
- Packing Method: Make sure to pack the fruit tightly but gently to avoid bruising the pieces. A jar funnel helps prevent spilling.
Troubleshooting Common Fruit Cocktail Canning Problems
1. Why Don’t My Jars Seal?
If your jars don’t seal properly, it could be due to a few factors:
- The lid may not be clean or free of debris.
- The band was tightened too much or too little.
- The jars weren’t processed for long enough.
2. Why Does My Fruit Cocktail Have Floating Fruit?
Floating fruit happens when the syrup is too thin, or the fruit isn’t packed tightly enough. Make sure your syrup is at the right thickness, and pack the fruit firmly but not too tightly in the jar.
How to Use Your Homemade Canned Fruit Cocktail
Once your fruit cocktail is canned and ready, there are countless ways to enjoy it. Use it in:
- Desserts: Add it to pies, cakes, or crumbles.
- Salads: Mix it with yogurt, nuts, and granola for a healthy snack.
- Smoothies: Blend with ice and juice for a refreshing drink.
Frequently Asked Questions About Canning Fruit Cocktail
1. Can I use frozen fruits for canning? Frozen fruits may not have the same texture as fresh fruits once canned, but they can still be used. Just ensure that the fruit is thawed before canning.
2. Do I need a pressure canner for fruit cocktail? No, fruit cocktail is typically canned using the water bath canning method. Pressure canning is required for low-acid foods, but fruit cocktail is high in acid and safe for water bath canning.
3. How long does canned fruit cocktail last? When stored properly in a cool, dark place, canned fruit cocktail can last up to a year.
Conclusion: Enjoy Your Homemade Fruit Cocktail Year-Round
Making your own fruit cocktail through canning is a fulfilling and practical way to preserve fresh fruits. It allows you to enjoy a homemade, customizable treat with all the flavors of the season, and you can rest assured that you’re avoiding the added sugars and preservatives found in store-bought options. We hope this comprehensive guide to fruit cocktail canning recipe helps you get started on your canning journey. Happy canning!
Fruit Cocktail Canning – Easy Homemade Recipe
Equipment
- Canning Jars (Pint or quart-sized)
- Lids and Bands (Canning-specific)
- Large Canning Pot (For water-bath canning)
- Jar Lifter (To safely handle hot jars)
- Funnel (To prevent spillage while filling jars)
- Cutting Board (For prepping fruits)
- Sharp Knife (For cutting fruits)
- Sterilizing Pot or Oven (For sterilizing jars)
- Large Saucepan (For preparing syrup)
- Measuring Cups (For syrup ingredients)
- Ascorbic or Citric Acid (To prevent fruit browning)
- Pectin (optional) (If you prefer to add to syrup for thickening)
Ingredients
- Fresh Seasonal Fruits Peaches, pears, grapes, pineapple, cherries, etc.
- Sugar To make syrup; adjust based on desired sweetness
- Water For syrup or juice
- Fruit Juice Optional, if you prefer not to use syrup
- Ascorbic Acid or Citric Acid To prevent browning, especially for apples and pears
- Pectin optional (For thicker syrup, if desired)
Instructions
- Sterilize the Jars and Lids: Place your canning jars and lids in a large pot of boiling water for 10 minutes, or sterilize them in an oven at 225°F for 15 minutes. This step ensures the jars are free from bacteria.
- Prepare the Syrup: In a large saucepan, combine water and sugar to create the syrup. Bring the mixture to a boil, stirring until the sugar dissolves. Adjust the sweetness based on preference (lighter syrup for less sweetness, heavier syrup for a richer flavor). Alternatively, you can use fruit juice for a more natural option.
- Prep the Fruits: Wash and peel (if necessary) the fruits. Cut them into uniform, bite-sized pieces. For fruits like apples or pears, use ascorbic or citric acid to prevent browning. Blanching is optional, depending on the fruit.
- Pack the Jars: Carefully pack the prepared fruit into the sterilized jars, ensuring an even distribution of types. Leave about ½ inch of headspace at the top. Pour the syrup or juice over the fruits, filling the jars to the top while leaving the appropriate headspace.
- Seal the Jars: Wipe the rims of the jars to remove any syrup. Place sterilized lids on the jars and screw on the bands just until snug. Do not overtighten.
- Process the Jars: Submerge the filled jars in a canning pot with water, ensuring the jars are completely covered. Bring the water to a boil and process the jars for about 30 minutes. After processing, carefully remove the jars using the jar lifter and allow them to cool completely.
- Check the Seal: After cooling, check the seals by pressing down in the center of the lid. If it doesn’t pop back, the jar is sealed properly. If it pops, refrigerate the jar and consume it soon.
- Store the Canned Fruit Cocktail: Store the sealed jars in a cool, dark place. The fruit cocktail will last up to a year when stored correctly.
Notes
- Choosing the Right Fruits: Use fresh, firm fruits that are in season. Ripe, but not overly soft, fruits will hold up better during the canning process.
- Syrup Alternatives: If you want a healthier version, you can reduce the sugar content or use honey or maple syrup as alternatives.
- Blanching Fruits: For fruits like peaches and pears, blanching (briefly boiling and then cooling in ice water) helps preserve their color and texture during canning.
- Shelf Life: Properly sealed fruit cocktail can last up to 12 months when stored in a cool, dry place. Always check seals before consuming, and consume opened jars within a few weeks.
- Flavoring Options: Feel free to add spices to the syrup, such as cinnamon or vanilla, for an extra twist in flavor.
Share Your Twist!
We’d love to hear how you make your fruit cocktail unique! Do you add a special fruit to your mix, or perhaps you’ve come up with a creative syrup recipe? Share your twist with us! Whether it’s a different combination of fruits or a special ingredient that makes your fruit cocktail stand out, we encourage you to get creative and inspire others. Drop your ideas or variations in the comments below – we can’t wait to see how you personalize this recipe!
